 SynthMaker
The face's area
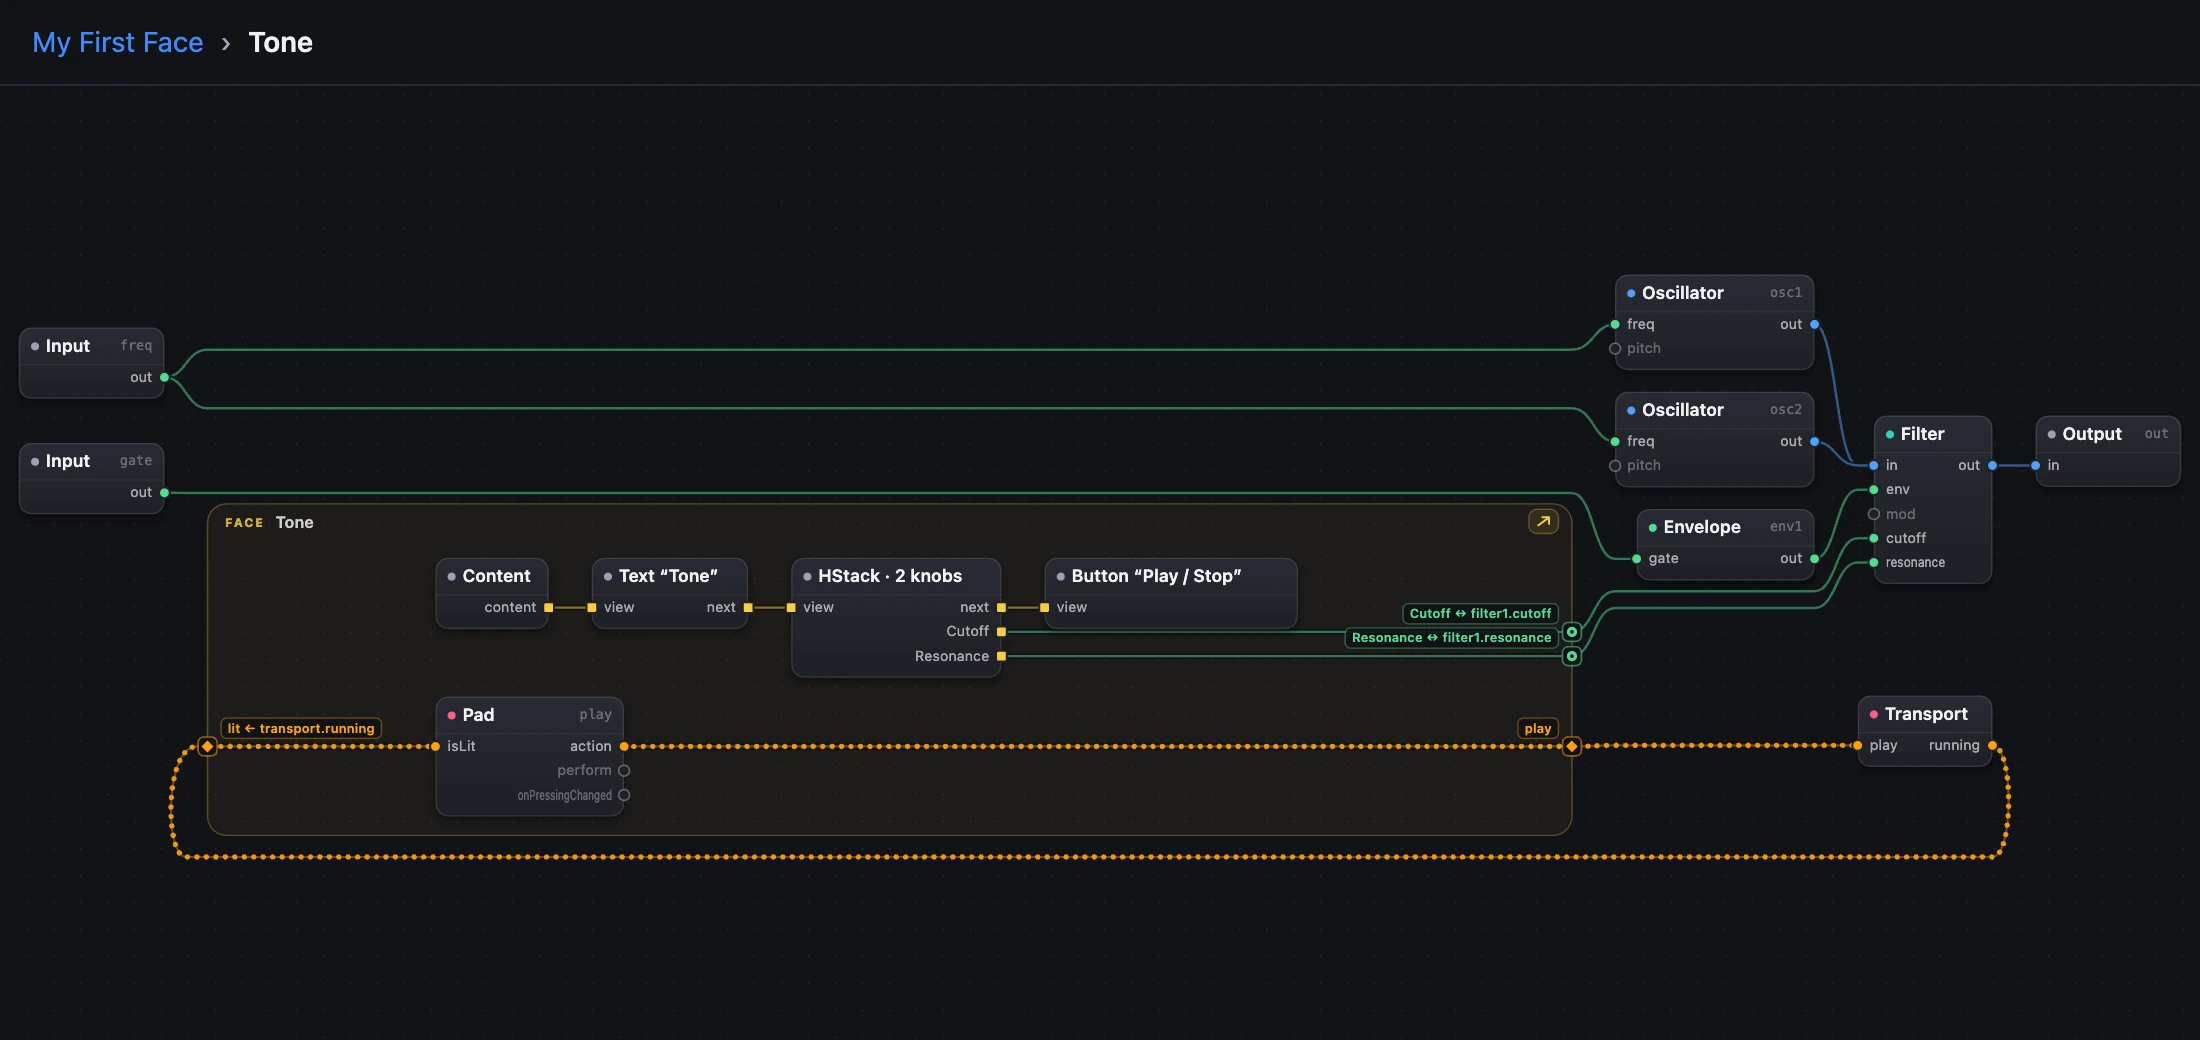
Inside a module of your own, its whole face sits in one light-yellow area of the Patch: its views, their modifiers and the Pads its buttons play. Only the wires that cross the area's edge go in or out, and each one does it through a port with a name.
1One area for the whole face
Open Tone. Its face is in view at once, the way it nests: a Content box starts its views in order, and each stack says what it holds (HStack · 2 knobs). Double-click a stack to go inside it, as before.
The face's Pads are in the area too, below its views, because they're the face's buttons. The rest of Tone (its oscillators, filter and envelope) stands outside.
2The ports on its edge
- ◆ on the right: a Pad's message going out, named after the Pad (
play), or a grid's bus, named after the grid (Launch ×4). - ◉ on the right: a binding, a knob and the setting it turns (
Cutoff ↔ filter1.cutoff). It works both ways. - ◆ on the left: a light coming in (
lit ← transport.running). A wire that comes from the right goes round the area, so it never crosses the face.
The ports keep the order of what's wired to them inside, top to bottom. When the Pads send their messages up a level, out of the module, they leave through the edge too.
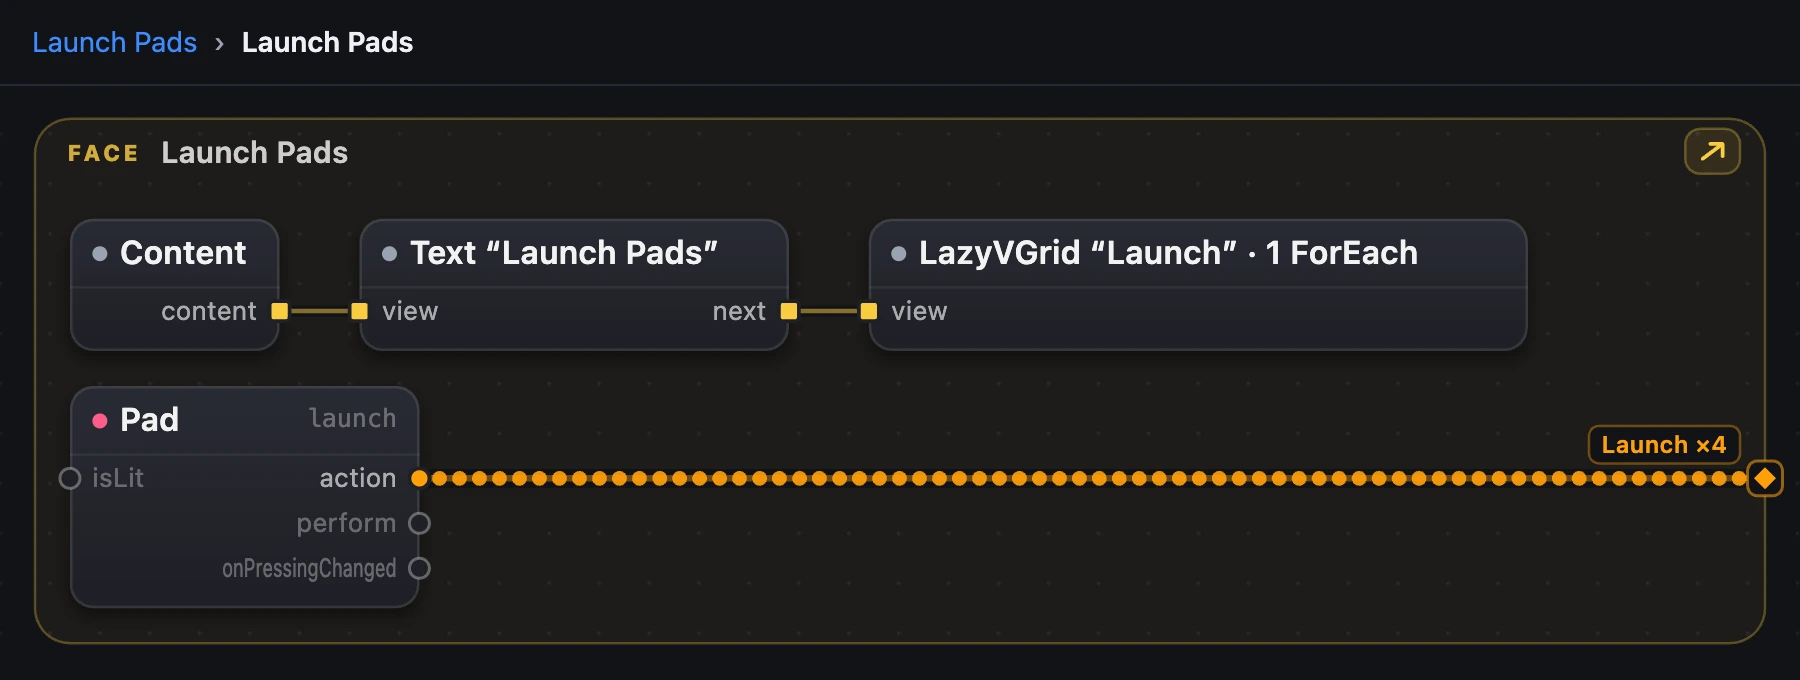
- The grid's bus, leaving the module.
3A knob where it makes sense
- Double-click HStack · 2 knobs to go inside the row.
- Right-click Knob “Cutoff” (touch and hold on a phone) and choose Place Cutoff beside Filter.
- Choose Tone in the breadcrumb.
The knob now stands beside the Filter it turns, in a small yellow area of its own, its binding a short wire. Choose it: a dotted line runs to its place in the face, and a label says where that is.
To move it back, choose Put Cutoff back in the face from the same menu.
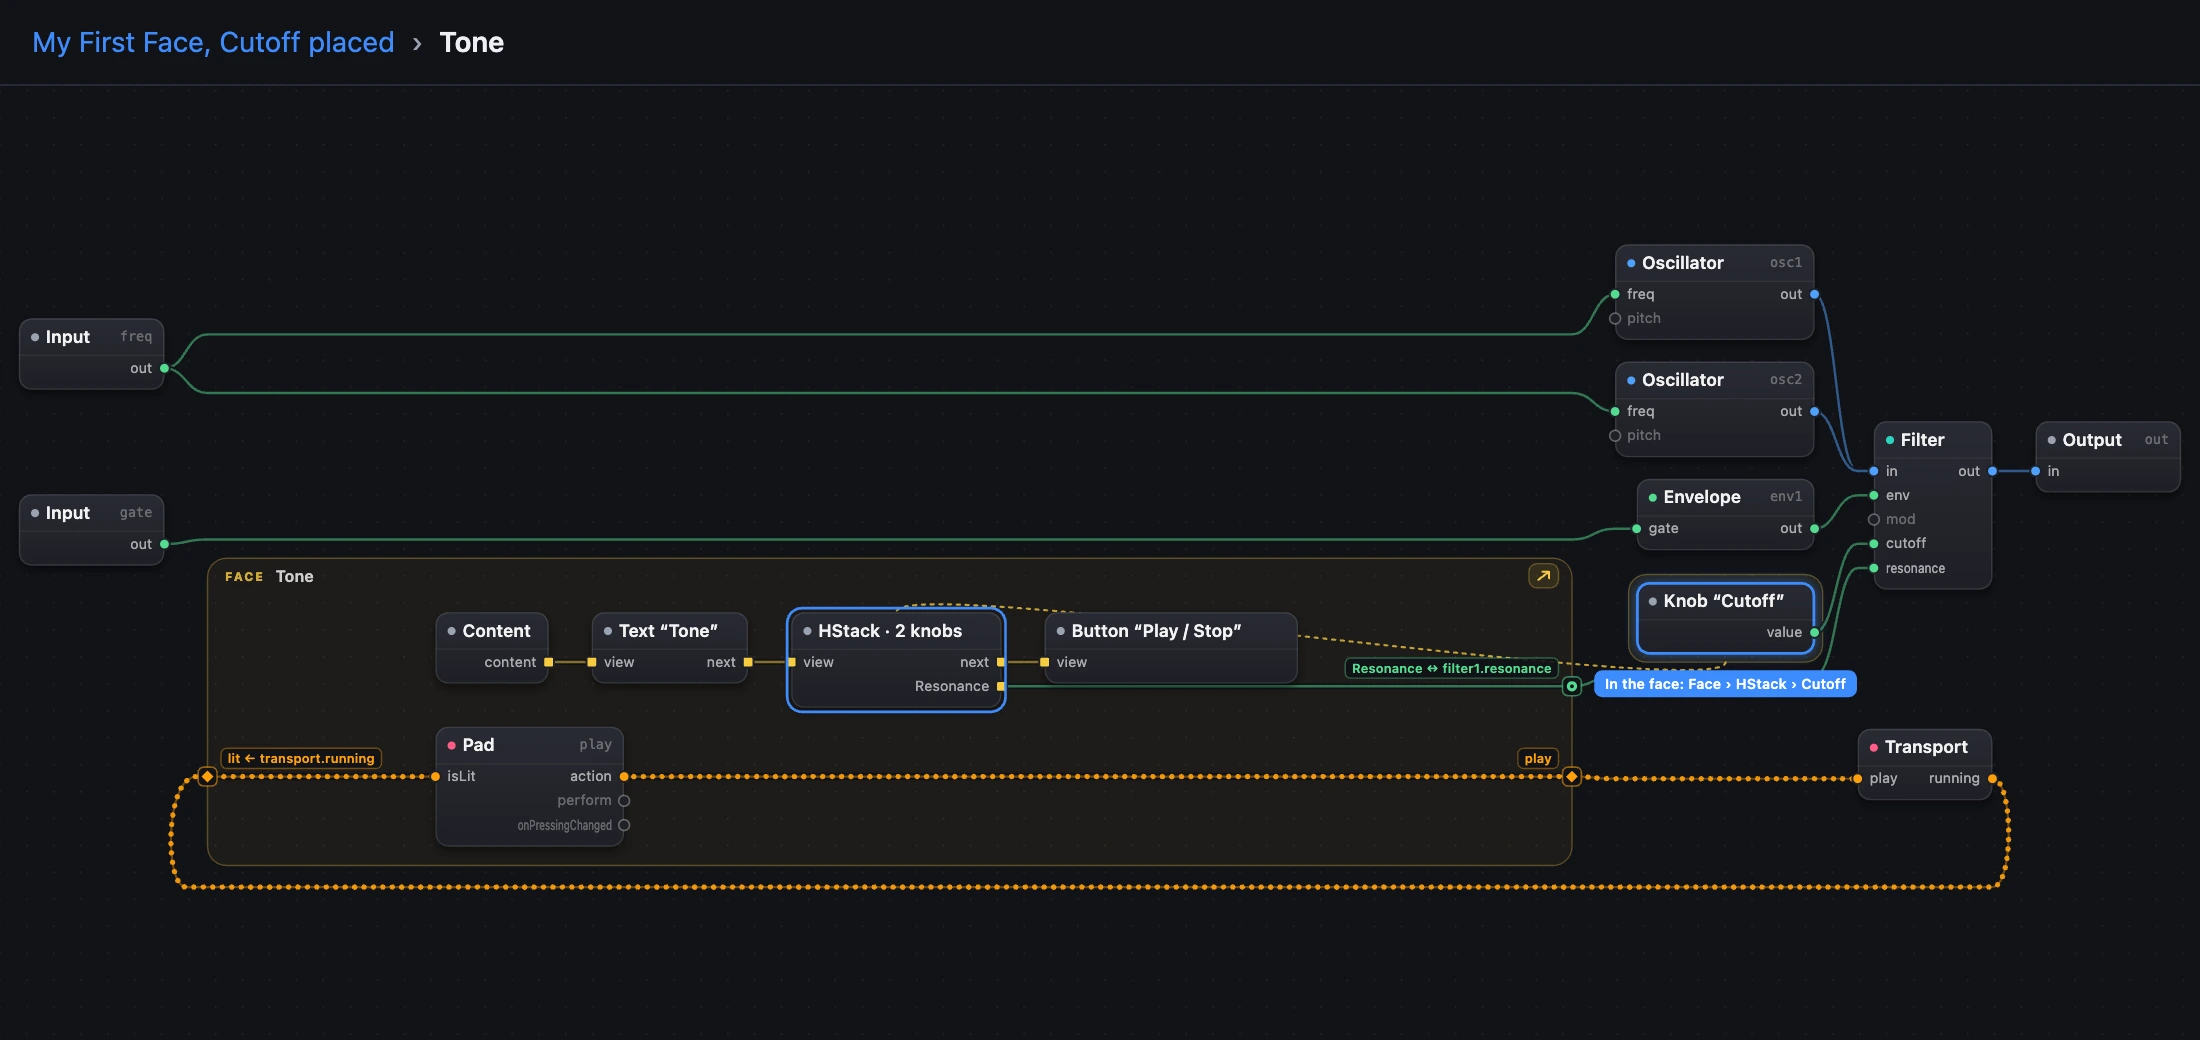
- The knob, placed.
- What it turns.
- Its place in the face.
4Open the face
The ↗ on the area's header, or a double-click on the header, opens the face's outer level: the breadcrumb's Face. In Flat, the whole face is drawn inside the same area.
Try it
- Open My First Face, then Tone, and find the face's area.
- Follow
Cutoff ↔ filter1.cutofffrom the HStack to the Filter. - Place Cutoff beside the Filter, choose it, then put it back.
Remember
- A face's views, modifiers and Pads sit in one yellow area.
- Only wires crossing its edge go in or out, each through a named port.
- A knob can stand beside what it turns; choose it to see where it lives in the face.